Simple Edits
Click the very first line of the file, which is a comment that says something like "6502bench SourceGen vX.Y.Z". There are three ways to open the comment editor:
- Select Actions > Edit Long Comment from the menu bar.
- Right click, and select Edit Long Comment from the pop-up menu. (This menu is exactly the same as the Actions menu.)
- Double-click the comment
Most things in the code list will respond to a double-click. Double-clicking on addresses, flags, labels, operands, and comments will open editors for those things. Double-clicking on a value in the "bytes" column will open a floating hex dump viewer. This is usually the most convenient way to edit something: point and click.

Double-click the comment to open the editor. Type some words into the upper window, and note that a formatted version appears in the bottom window. Experiment with the maximum line width and "render in box" settings to see what they do. You can hit Enter to create line breaks, or let SourceGen wrap lines for you. When you're done, click OK. (Or hit Ctrl+Enter.)
When the dialog closes, you'll see your new comment in place at the top of the file. If you typed enough words, your comment will span multiple lines. You can select the comment by selecting any line in it.
Click on the comment, then shift-click on L1014. Right-click, and look at the menu. Nearly all of the menu items are disabled. Most edit features are only enabled when a single instance of a relevant item is selected, so for example Edit Long Comment won't be enabled if you have an instruction selected.
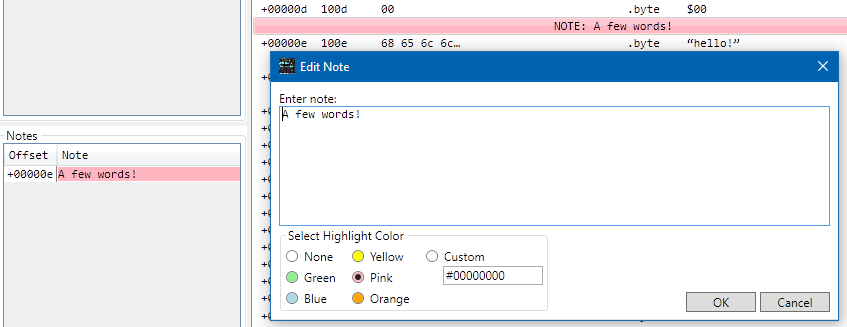
Let's add a note. Click on $100E (the line with "hello!"), then select Actions > Edit Note. Type a few words, pick a color, and click OK (or hit Ctrl+Enter). Your note appears in the code, and also in the window on the bottom left. Notes are like long comments, with three key differences:
- You can't pick their line width, but you can pick their color.
- They don't appear in generated assembly sources, making them useful for leaving notes to yourself as you work.
- They're listed in the Notes window. Double-clicking them jumps the selection to the note, making them useful as bookmarks.

It's time to do something with the code. If you look at what the code
does you'll see that it's copying several dozen bytes from $1017
to $2000, then jumping to $2000. It appears to be relocating the next
part of the code before
executing it. We want to let the disassembler know what's going on, so
select the line at address $1017 and then
Actions > Set Address. (Or double-click on
"1017" in the Addr column.)
In the Set Address dialog, type "2000", and hit Enter.)
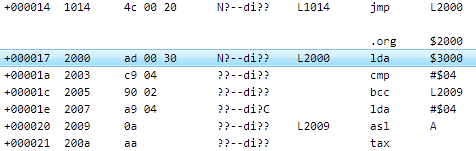
Note the way the code list has changed. When you changed the address,
the JMP $2000 at address $1014 found a home inside
the bounds of the file, so
the code tracer was able to find the instructions there.
From the menu, select Edit > Undo. Notice how everything reverts to the way it was. Now, select Edit > Redo to restore the changes. You can undo any change you make to the project. (The undo history is not saved in the project file, though, so when you exit the program the history is lost.)
As you make alterations to the addresses, notice that, while the Address column changes, the Offset column does not. File offsets never change, which is why they're shown here and in the References and Notes windows. (They can, however, be distracting, so you'll be forgiven if you reduce the offset column width to zero.)
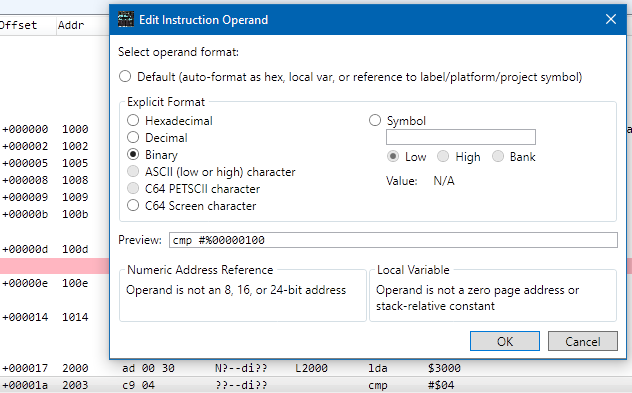
Select the line with address $2003 ("CMP #$04"), then Actions > Edit Operand. This allows you to pick how you want the operand to look. It's currently set to "Default", which for an 8-bit immediate argument means it's shown as a hexadecimal value. Click "Binary", then "OK". It now appears as a binary value.

On that same line, select Actions > Edit Comment. Type a short comment, and hit Enter. Your comment appears in the "comment" column.