6.1 KiB
| title | has_children | nav_order |
|---|---|---|
| Overview | false | 1 |
TommyPROM - An Arduino-based EEPROM programmer
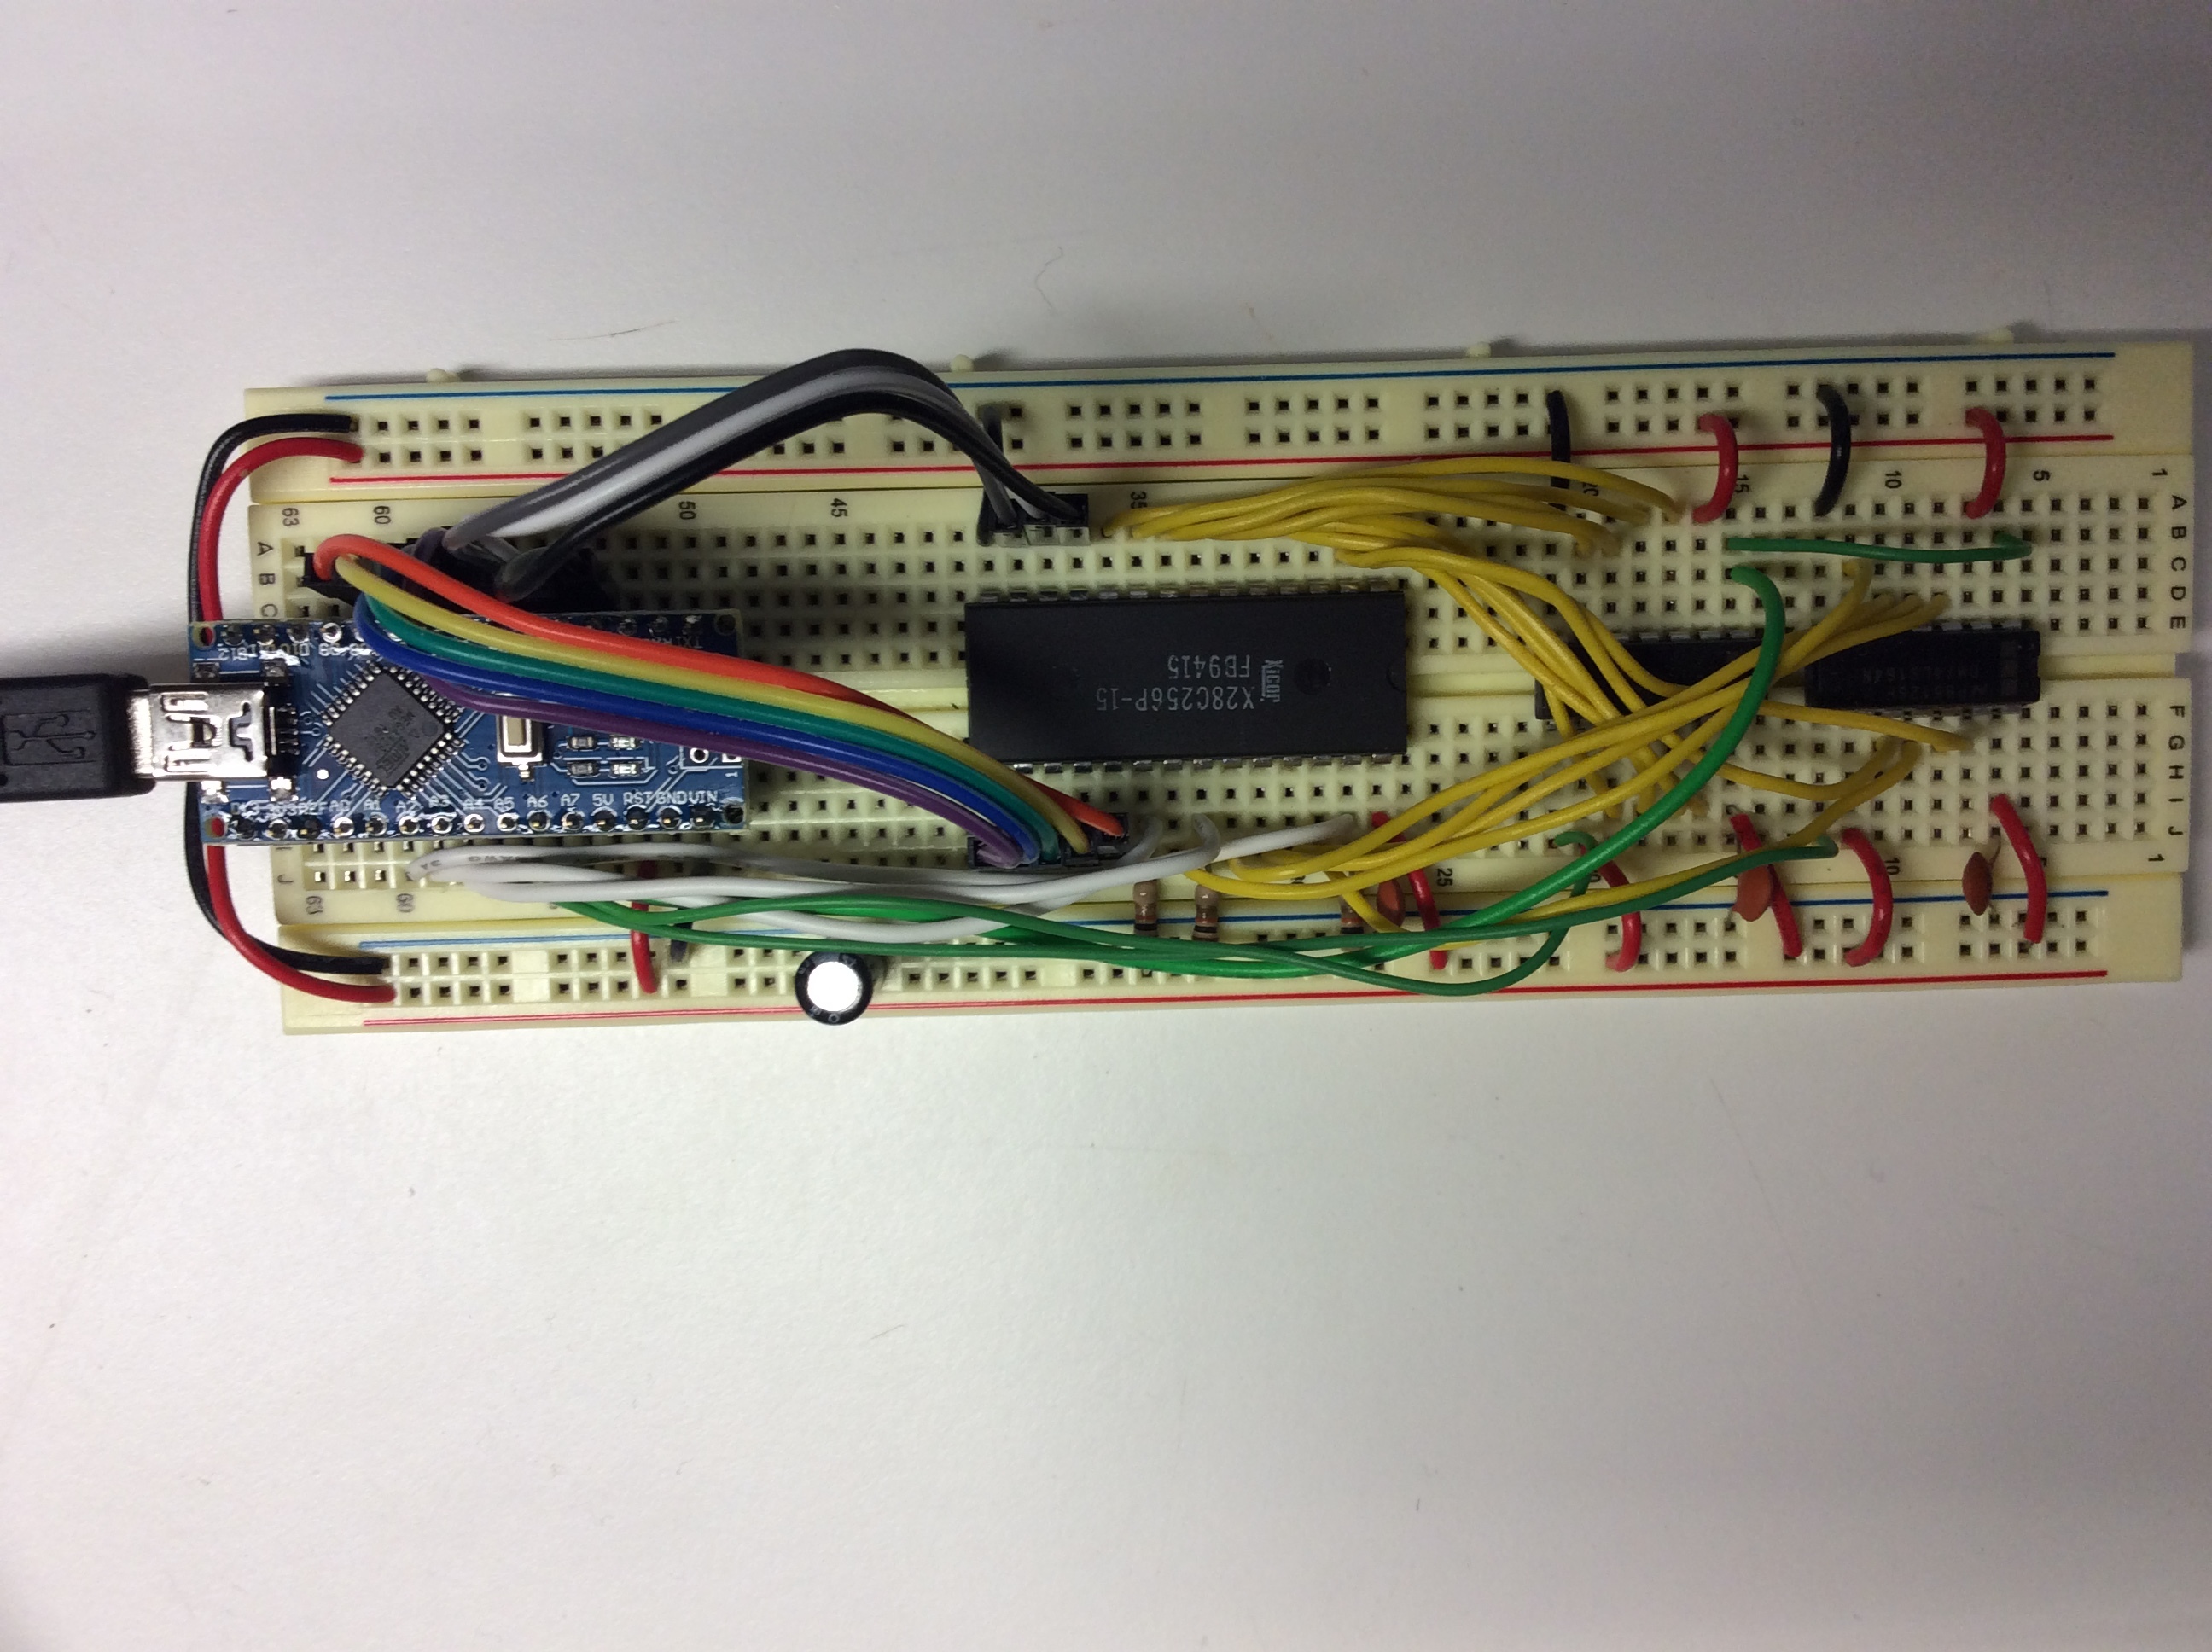
This is a simple EEPROM programmer and reader that can be assembled using an Arduino and a few additional parts. It has been successfully built using the Arduino UNO, Nano and Boarduino models.
The original code was specific to the 28C256 32Kx8 EEPROM, but it has been extended to also support Intel 8755A EPROMS and some 29C010 Flash.
The 28C design can be used with other 5V EEPROMS as well. Many 5V chips, including UV EPROMs, such as the 2716, 2764, 27C2001 and 27C040, can be read, but not written, with the basic hardware. Some pin changes may be needed to get the signals to the correct pins on the device. See the extension readme for details on suggested hardware and software changes needed to support new EPROM and EEPROM families.
The PROM-specific code is modular and can be easily adapted to support additional devices. There are currently drivers and hardware designs for 28C series EEPROMS and the Intel 8755A EPROM.
Some 29C series chips, like the 29C010 can be written with the 28C hardware. The 29C series only differs from the 28C in that the 29C chips erase and write an entire sector at a time. The 29C010 and some 29C020 chips use a 128 byte sector, which matches the XModem buffer in the current code. Other 29C020s and all 29C040s use a 256 byte sector and cannot be written without code changes to buffer up an entire 256 byte block of data before writing.
Features include:
- Simple hardware design that can be assembled on a breadboard.
- ROM images transfers using XMODEM - no special host client needed.
- Support for fast block EEPROM writes - a 32K EEPROM will program in just a few seconds.
- Optimized code that supports the timing requirements needed to unlock the 28C series Software Protection Algorithm.
- Modular software design to easily support other EEPROM and EPROM families.
The hardware readme has schematics and more information on the hardware design. The software readme has class definitions and more information on the software design.
The project was inspired by the MEEPROMMER programmer.
Compiling
Open the TommyPROM.ino file in the Arduino IDE. It should automatically open the cpp and h files as well. The default code programs 28C series chips using Arduino Nano hardware. To use this version, just compile and upload it to the Arduino.
Note well that this code has been optimized for the Aduino UNO and Nano hardware so that it can run quickly enough to meet 28C series chip timing requirements for SDP unlocking. To use different Arduino hardware, like the Micro, the board-specific code in PromDevice.cpp and PromAddressDriver.cpp must be change to match the port mappings between the ATmega chip and the Arduino I/O pins.
To use the 8755A version of the code and matching hardware, uncomment PROM_IS_8755A and comment out the other PROM_IS_xx choices in Configure.h.
Operation
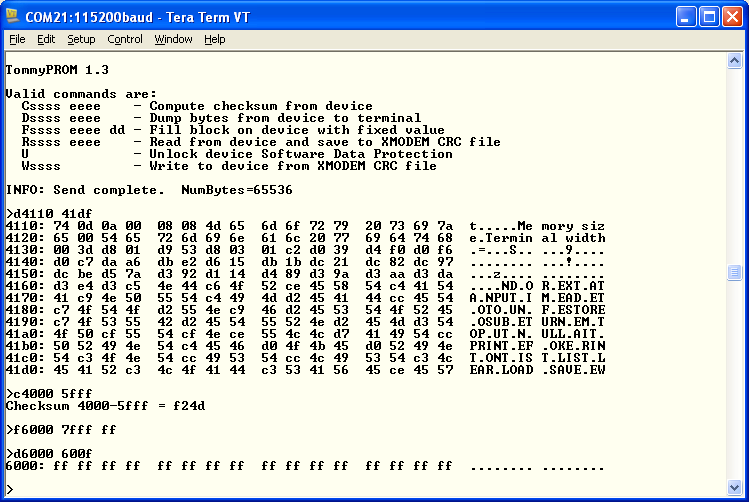
To use the programmer, connect the Arduino USB to the host computer and run a terminal program, such as TeraTerm (Windows) or Minicom (Linux). The Arduino development Serial Monitor can also be used as a terminal initially, but it does not support XMODEM transfers, so the READ and WRITE commands can't be used.
Set the terminal's serial parameters to 115200 baud, 8 bits, no parity, 1 stop bit to match the Arduino. Press the Enter key. If the connection is successful, TommyPROM will display a menu of options.
Most of the commands take a start address parameter, always entered as 1 to 5 hex characters. Leading zeros are not required. If needed, the end address parameter is also in hex. Parameters are separated by a space. For example, either of the commands:
d0000 01ff
d0 1ff
dump memory from 0000H to 01ffH. Note that commands and parameters can be entered in uppercase or lowercase.
The R command is used to read from a PROM and save a binary image on the host. The W command receives a file from the host and writes (burns) it into the device. The R command needs a start and end address. The W command determines the end address from the received file size.
The READ and WRITE commands both use XMODEM CRC to complete the file transfers. Many terminal programs default to XMODEM Checksum format, so be sure to select XMODEM CRC as the format. Once the READ or WRITE command is issued to the programmer, the transfer must be started on the host program.
The files used for READ and WRITE are simple binary images. This can be created directly by asm85 or can be converted from S-record or Intel HEX using an external utility.
Troubleshooting
- Verify that the Arduino type you are using is a supported board or that its I/O port definitions match one of the supported boards. Some other Arduino boards, like the Duemilanove, appear to be compatible but have not been tested. Others, like the Micro, have different port mappings and definitely will not work without software changes.
- If the code doesn't appear to be working, concentrate on the read operations first to verify that the data and address paths are good.
- 28C series EEPROMS, like the X28C256, sometimes ship from the factory with Data Protection enabled. Use the UNLOCK command to disable this. See the 28C Readme for more information.
- Re-check all hardware connections and verify the the control pins are going to the Arduino pins that match the definitions in the code.
- This repo contains a standalone program called HardwareVerify that allows low-level access to the address, data, and control lines through a menu-driven interface. See the troubleshooting section for more tips.
Further Work
- Add a new PromDevice class for 27 series EPROMS.
- Additional error checking in the CmdLine code.